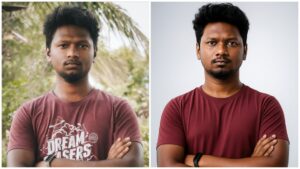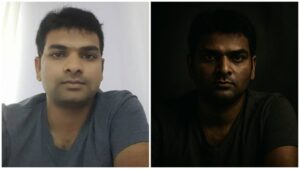
Casual selfies are often snapped quickly — for stories, status updates, or just checking lighting. But what if you could take that everyday selfie and transform it into something that looks like it came out of a 1940s noir film or a vintage Hollywood poster?
In this guide, you’ll learn how to convert a casual selfie into a vintage cinematic portrait — complete with sepia tones, authentic film grain, strong contrast, and a clean, distraction-free background.
Whether you want this look for:
- 🎞️ Film-themed Instagram posts
- 🎭 Acting/modeling portfolio
- 📜 Vintage poster-style portraits
- 🧑💻 LinkedIn with a creative twist
- 📚 Author photos
…this tutorial is for you.
🔍 What Makes a Portrait Look “Vintage Cinematic”?
To understand how to recreate vintage cinematic style, you must break it down:
| Element | Vintage Purpose |
|---|---|
| Sepia tones | Mimics early photographic color processing |
| Strong contrast | Brings out depth in facial features |
| Film grain | Simulates analog film realism |
| Uncluttered background | Keeps the subject timeless and focused |
| Framing and posture | Enhances the classic feel |
Let’s break it down step-by-step using tools available for mobile, desktop, and AI platforms.
🛠️ Tools You Can Use
Desktop Editors:
- Adobe Photoshop
- Lightroom Classic
- Capture One
- Luminar Neo
- Affinity Photo
Mobile Apps:
- Lightroom Mobile
- Snapseed
- VSCO
- Afterlight
- 1998 Cam / Huji Cam
AI Tools:
- DALL·E 3 / MidJourney v6
- Remini (for upscaling)
- Leonardo.Ai
- Runway ML
🧭 Step-by-Step Guide: From Selfie to Vintage Masterpiece
📸 Step 1: Start With a Good Selfie
You don’t need professional lighting — just a clean selfie with:
- Natural or side lighting
- Minimal background clutter
- Neutral facial expression
- Clear focus (not blurry or low-res)
Frontal shots or slightly turned angles work best.
🎨 Step 2: Convert to Black & White First
Starting with black and white (B&W) helps set the cinematic tone. Sepia is added later.
In Lightroom:
- Convert to B&W profile
- Increase contrast (+20 to +30)
- Boost clarity (+10)
- Lower blacks (-20) to intensify shadows
In Photoshop:
- Use Black & White Adjustment Layer
- Adjust Red and Yellow sliders to brighten skin tones
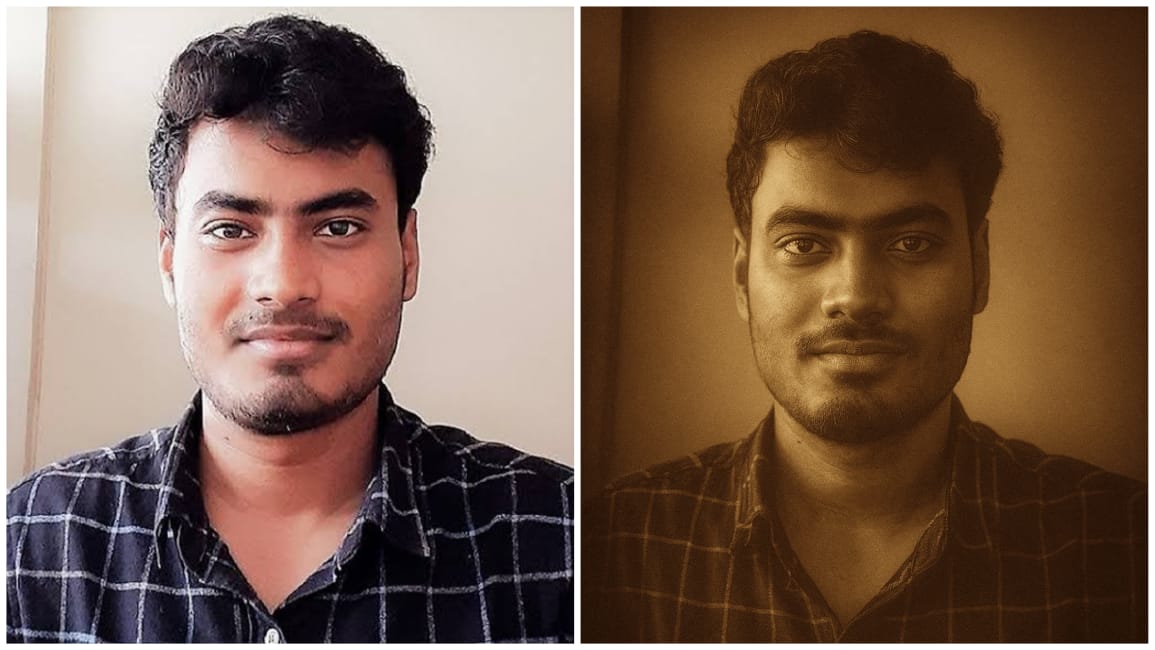
☕ Step 3: Add Sepia Tones
Sepia gives your photo a warm, nostalgic glow.
Lightroom:
- Go to “Color Grading” panel
- Shadows: Hue ~40, Saturation 25
- Midtones: Hue ~35, Saturation 20
- Highlights: Hue ~45, Saturation 15
Photoshop:
- Add Photo Filter Adjustment Layer
- Filter: Sepia
- Density: 30–40%
Mobile (VSCO or Snapseed):
- Use built-in sepia filters like:
- M5 (VSCO)
- Retrolux > Style Strength (Snapseed)
📽️ Step 4: Add Authentic Film Grain
Grain makes the photo feel analog, like it was shot on Kodak film.
Lightroom:
- Go to “Effects” Panel:
- Grain: 20–30
- Size: 25
- Roughness: 50
Photoshop:
- Add a Noise layer on top:
- Filter > Noise > Add Noise
- Amount: 5–10%
- Distribution: Gaussian
- Monochromatic: Checked
- Blend Mode: Overlay or Soft Light
- Lower opacity to 30–40%
Apps:
- Use 1998 Cam or Huji Cam for baked-in vintage grain
- Afterlight > Dust & Texture filters
⚫ Step 5: Enhance Contrast for Cinematic Depth
Contrast is key to make facial features pop.
Lightroom:
- Contrast: +25
- Whites: +15
- Blacks: -20
- Dehaze: +5
Photoshop:
- Use Curves Adjustment Layer
- Add a slight S-curve for punchy midtones and rich shadows
Snapseed:
- Use Tune Image:
- Contrast: +30
- Ambiance: -10
- Shadows: -20
🧱 Step 6: Keep the Background Uncluttered
If the selfie has distractions (objects, clutter), isolate the subject:
Photoshop:
- Use Select Subject > Mask background
- Add Gaussian blur to simulate shallow depth
- Or replace with a subtle gradient (beige, gray, or sepia hue)
Lightroom:
- Use Subject Mask
- Lower clarity or sharpness in the background
- Decrease saturation and brightness
Mobile:
- Use Lensa or Snapseed Selective Tool to blur distractions
- Or crop the photo to focus on the head & shoulder
👓 Step 7: Sharpen the Eyes & Lips
Even in vintage portraits, the eyes should remain sharp.
Lightroom:
- Use Brush Tool on eyes:
- Clarity: +20
- Sharpness: +40
- Texture: +15
Photoshop:
- Duplicate layer
- Use Unsharp Mask:
- Amount: 125%
- Radius: 1.0
- Threshold: 0
- Apply only to eyes/lips using layer mask
This creates contrast between crisp detail and soft grain, like classic film portraits.
🖼️ Step 8: Frame Like an Old Film
Frame your portrait like an old headshot or movie still.
- Use 4:3 aspect ratio for a classic portrait
- Crop slightly off-center for depth
- Add black borders or film-frame overlays for style
🎬 AI Prompt for Quick Results
Want to generate this through an AI tool like MidJourney or DALL·E? Here’s your universal prompt:
“A vintage cinematic portrait of a person, sepia-toned, strong contrast, soft film grain, clean background, sharp eyes, slightly moody expression, natural lighting, 4:3 composition, head and shoulders crop, inspired by 1940s Hollywood film photography.”
Add details like:
- “Wearing a coat / scarf / vintage glasses”
- “Taken near a plain wall”
- “Textured background in sepia beige”
Use variations to match your selfie’s vibe.
🎯 Where to Use These Portraits
- 📕 Book author bio photos
- 📼 Music cover art with retro style
- 🎥 Vintage movie fan pages or profile pics
- 🖼️ Etsy/creative shops for branding
- 📰 Magazine-style Instagram carousels
They grab attention by standing out — classic in a sea of filters.
⚠️ Mistakes to Avoid
| Mistake | Solution |
|---|---|
| Over-yellow sepia | Stick to soft amber/brown shades |
| Excessive blur | Preserve clarity in subject’s eyes & lips |
| Too much grain | Keep it subtle (don’t look pixelated) |
| Messy background | Use masking or blur to clean it up |
| Over-smooth skin | Keep vintage texture alive |
✅ Final Touch Checklist
| Element | Applied? |
|---|---|
| Sepia Tone | ✅ |
| High Contrast | ✅ |
| Realistic Film Grain | ✅ |
| Uncluttered Background | ✅ |
| Sharp Eyes & Lips | ✅ |
| 4:3 Framing | ✅ |
📁 Optional Goodies (Available on Request)
Would you like ready-made resources?
✅ Lightroom preset: “Cinematic Sepia V1”
✅ Photoshop actions: Sepia tone, grain, contrast boost
✅ Overlay pack: Vintage film frames, dust, and scratches
✅ AI style card: MidJourney-ready prompt visuals
✅ PSD template with subject-mask and film look
Just ask, and I’ll bundle everything in a downloadable ZIP for you.
💬 Final Thoughts
There’s something timeless about sepia. It’s nostalgic, poetic, and quietly powerful. By blending sepia tones with film grain and strong contrast, you give your selfie more than just a makeover — you give it a story.
Vintage cinematic portraits aren’t just edits — they’re frames of a film that never existed, yet feel familiar.
So next time you take a simple selfie near a wall, don’t underestimate it. With a few tweaks, it might just become your most memorable portrait yet. 🎞️✨